Foreword
Welcome to my Kiribati 36 DIY build journey. A 36′ Aluminium ‘Bluewater’ sailboat with twin rudders and a retractable keel. After completing a global circumnavigation on two wheels (See: Blog | YouTube) I now set my sights on doing the same by water. My hope is that the build, cost tracking and lessons learned will aid aspiring boat builders in their own quest. Please know the following:
- I have no affiliation with the company selling the boat plans, in other words, my words are my own. I am however affiliated with Google AdWords in the hope that any revenue made will assist towards completing this project.
- in the event of me deviating from the original build plans, adding my own parts, or amending parts then this is highlighted in the articles with ‘** Note‘.
- An up-to-date parts/article Index (including total expenditure) can be found: HERE
- Feel free to ask question via this blog, YouTube comments, or email: kiribati36 @ modularhippo.com – My aim is to respond to questions within 24 hours.
Cost To Date: £2,071.08->£2,356.25 | $2,384.34->$2,719.91
Index
Build Progress
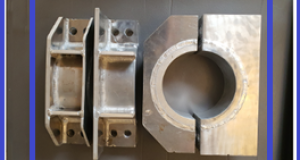
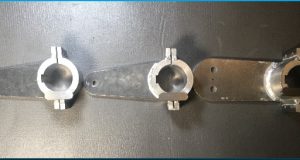
With the Tiller Shaft Structure assembled and welded it made sense to move on to the actual bearings that will allow the tiller shaft to be able to swivel on it’s vertical axis. An upper & lower aluminum foot with a Delrin bearing inside. These parts were to large for me to manufacture on my small lathe so had to contract a local machinist to assist me with them.
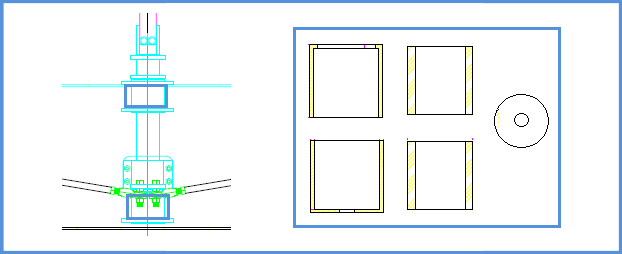
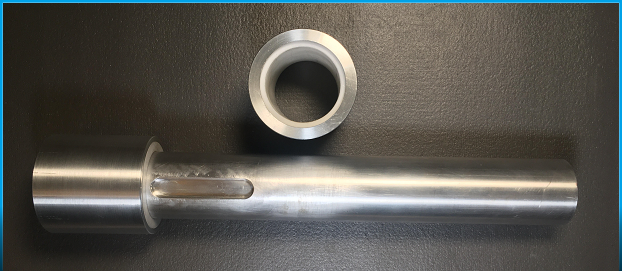
In first photo you can see the manufactured top and bottom shoes, second photo displaying the corresponding Delrin bearings. The third photo (** Note (deviation from plans)) is a puck that I created for the bottom shoe to enable less friction. For the very same reason I also created a spherical ending (** Note (deviation from plans)) on the actual tiller shaft so that the rounded surface could run effortless against the puck in question. How this will work practically remains to see. Bottom photo is the upper shoe with bearing next to the Tiller Shaft Rod for clarification:

Cost Tracking
Total Cost Chronological Order:
| 3 | PARTS/MATERIAL | EXTERNAL LABOUR | TOOLS & MISC. | TOTAL |
| (GBP) | £197.58 | £310.76 | £1847.91 | £2,356.25 |
| (USD) | (≈$229.74) | (≈$362.73) | (≈$2127.44) | (≈$2,719.91) |
Article Breakdown Categories (when applicable):
- Parts/Material – Any raw material that I needed, or any ready made parts.
- External Labour – External help with machining, milling or welding.
- Tools & Misc. – Cost related to project, but not part of physical boat itself.
- Category Breakdown – Cost Tracking per Category in GBP|USD|AUD|%.
| PARTS/MATERIAL | (GBP) | (USD) |
| Top & Bottom Housing – Material Type: AL 6082 T6 OD: Ø101.6 (4′) – (Material) | £34.51 | (≈$40.61) |
| Puck: 1 x Round Acetal Delrin Rod Black White billet bar 70 mm (Material) | 14.99 | (≈$17.64) |
| 2 x Delrin Top & Bottom bushes 90 OD x 300mm (Material) | £49.00 | (≈$57.66) |
| (Part 3) | Tiller Bearings | £98.50 | (≈$115.91) |
| EXTERNAL LABOUR | (GBP) | (USD) |
| Top & Bottom Housing – Material Type: AL 6082 T6 OD: Ø101.6 (4′) – (Machining – External Labour) | £66.67 | (≈$78.45) |
| 1 x Acetal Delrin – Bottom Puck – (Machining – External Labour) | £15.00 | (≈$17.65) |
| Tiller end made spherical for less contact friction – (Lathing – External Labour) | £15.00 | (≈$17.65) |
| Delrin Top & Bottom bushes (Machining – External Labour) | £90.00 | (≈$105.91) |
| (Part 3) | Tiller Bearings | £186.67 | (≈$219.66) |
| CATEGORY | (GBP) | (USD) | % |
| PARTS/MATERIAL | £98.50 | (≈$115.91) | 34.54% |
| EXTERNAL LABOUR | £186.67 | (≈$219.66) | 65.46% |
| TOOLS & MISC. | £0 | (≈$0) | 0% |
| TOTAL | £285.17 | (≈$335.57) | 100% |

Lessons Learned
- The biggest lesson taken from this part of the build was to always ask for a fixed price when or hourly rate as and when working with a new external source. When working with a machinist who assisted with some of the parts (and other parts not part of this blog chapter) I got stung with a overpriced bill due to trusting that he would be fair. I got the explanation that he was working on the side on the parts and had to stop and start 7-8 times before completion. I argued that rigging a lathe sometimes take longer than the actual lathing and that it was not fair that I had to pay for his stop, start process. I luckily found a better machinist who had a fair pricing and have stuck with him through the build.
- Another lesson learned was to see the build plans as ‘work in progress’. There may be parts and functionality that can be enhanced and to not be afraid to bounce ideas with the designer. Plans like these constantly evolve and it is a good feeling to be able to contribute towards this no matter how small your input is.
Related Links


